 ElasticSearch Kibana白金级破解
[toc]
该方法仅用作学习交流,如有侵权请联系,立即删除
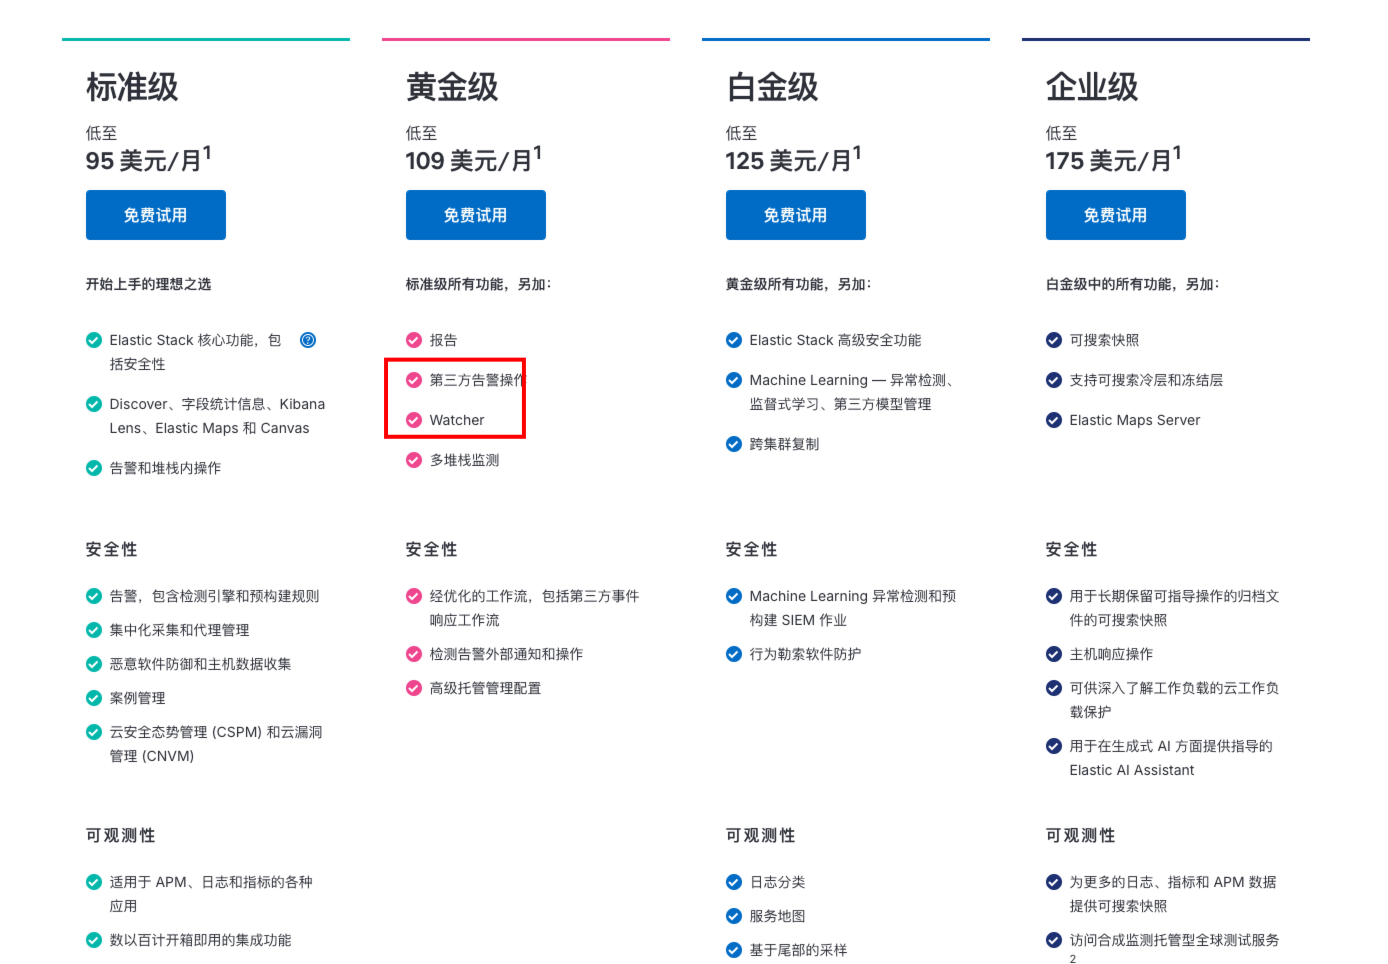
日常开发中可能会想用Kibana的邮件告警功能,但是这个功能默认是收费的,这里介绍一下如何破解白金版Kibana。如果没有大的改版,该破解方法使适用于所有版本。
# 版本信息
ElasticSearch版本:7.14.2
Kibana版本:7.14.2
操作系统:CentOS 7.x
# 准备工作
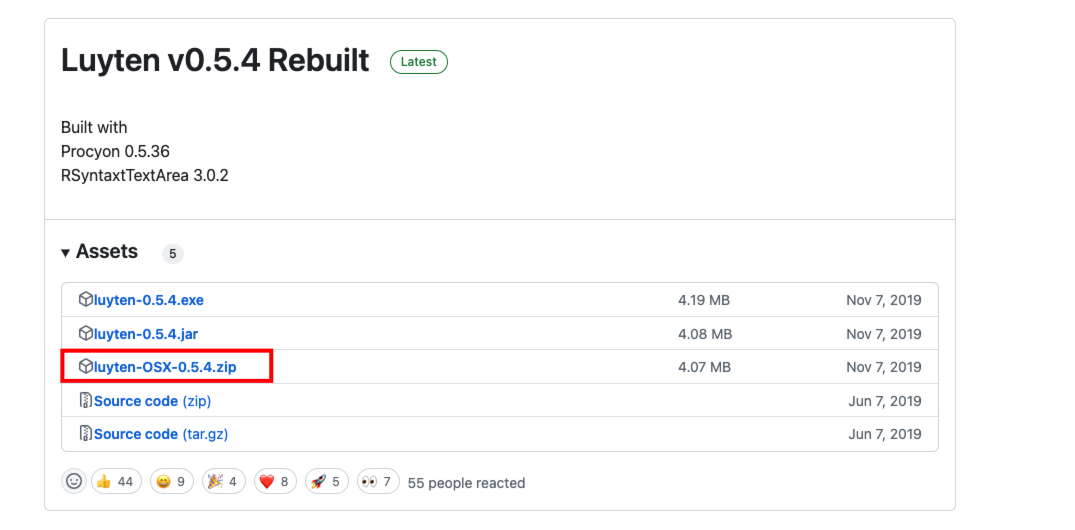
# 下载反编译工具
tip:
也可以直接下载我处理完的安装包,就不用自己反编译了,版本是:7.14.2
链接: https://pan.baidu.com/s/1s89Jc_VTkYA5cXJcEYcNog?pwd=tznb 提取码: tznb
我系统是MacOS,这里下载luyten-OSX-0.5.4.zip
# 注册License
https://license.elastic.co/registration (opens new window)
除了邮箱其他的随便填写,能收到邮件就可以

# 实现原理
我们申请的license是这样的
{
    "license": {
        "uid": "xxxx",
        "type": "basic",
        "issue_date_in_millis": 1712880000000,
        "expiry_date_in_millis": 1744502399999,
        "max_nodes": 100,
        "issued_to": "ljfd jiejsl (JDK)",
        "issuer": "Web Form",
        "signature": "xxxx",
        "start_date_in_millis": 1712880000000
    }
}
2
3
4
5
6
7
8
9
10
11
12
13
我们可以手动修改到期时间和type,使用我们拥有收费版功能,当然会校验迁移,我们修改Xpack包,使其校验signature失败就可以了。
# 实现步骤
# 下载需要破解Jar包
在ElasticSearch安装包(安装目录)中找到下面这个文件,并下载到本地
elasticsearch-7.14.2/modules/x-pack-core/x-pack-core-7.14.2.jar
# 反编译
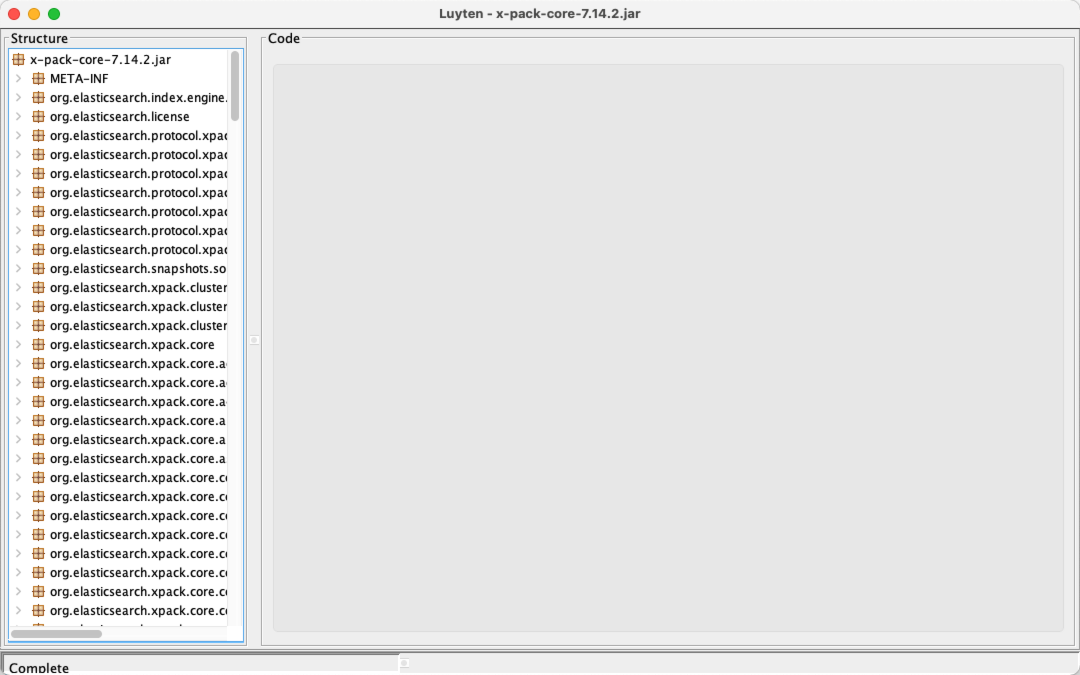
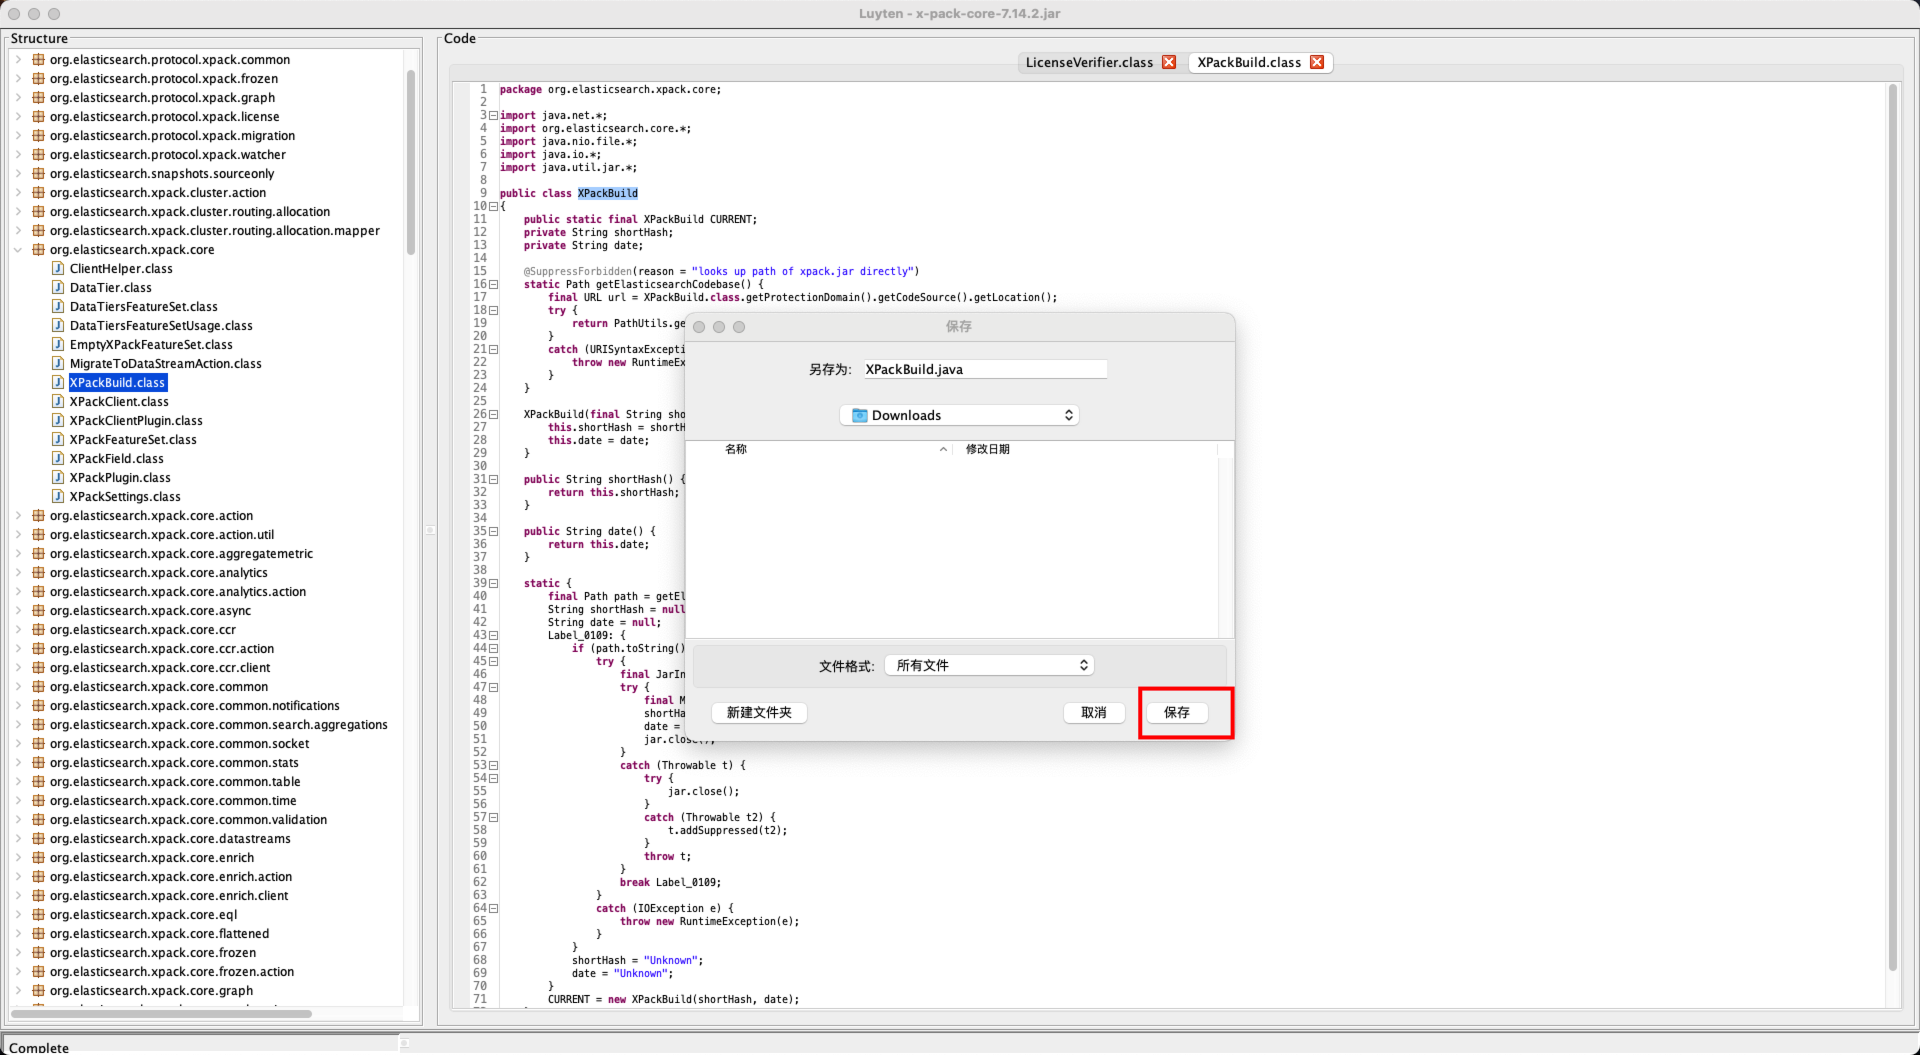
用Luyten工具打开Jar包
# 修改源码
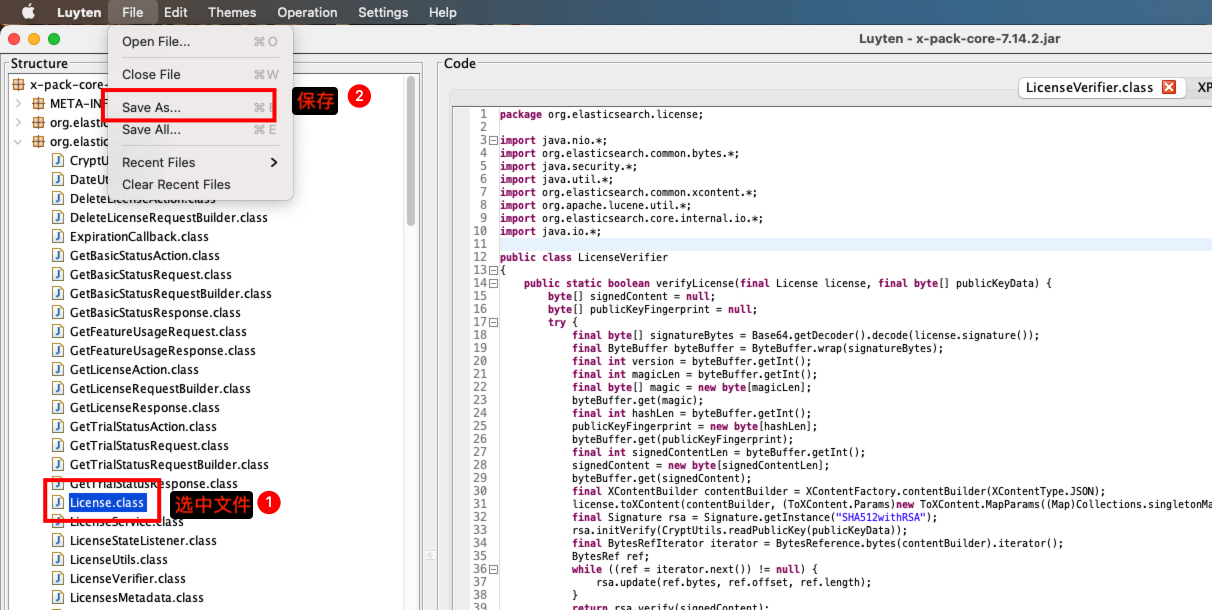
需要修改两个文件:
- org.elasticsearch.license.LicenseVerifier
- org.elasticsearch.xpack.core.XPackBuild
通过Luyten工具将上面两个文件导出
# LicenseVerifier修改
这个类只有两个方法,把他返回结果直接改成返回true。
修改后的内容
package org.elasticsearch.license;

import java.nio.*;
import org.elasticsearch.common.bytes.*;
import java.security.*;
import java.util.*;
import org.elasticsearch.common.xcontent.*;
import org.apache.lucene.util.*;
import org.elasticsearch.core.internal.io.*;
import java.io.*;

public class LicenseVerifier
{
    public static boolean verifyLicense(final License license, final byte[] publicKeyData) {
         return true;
    }

    public static boolean verifyLicense(final License license) {
        return true;
    }
}
2
3
4
5
6
7
8
9
10
11
12
13
14
15
16
17
18
19
20
21
# XPackBuild修改
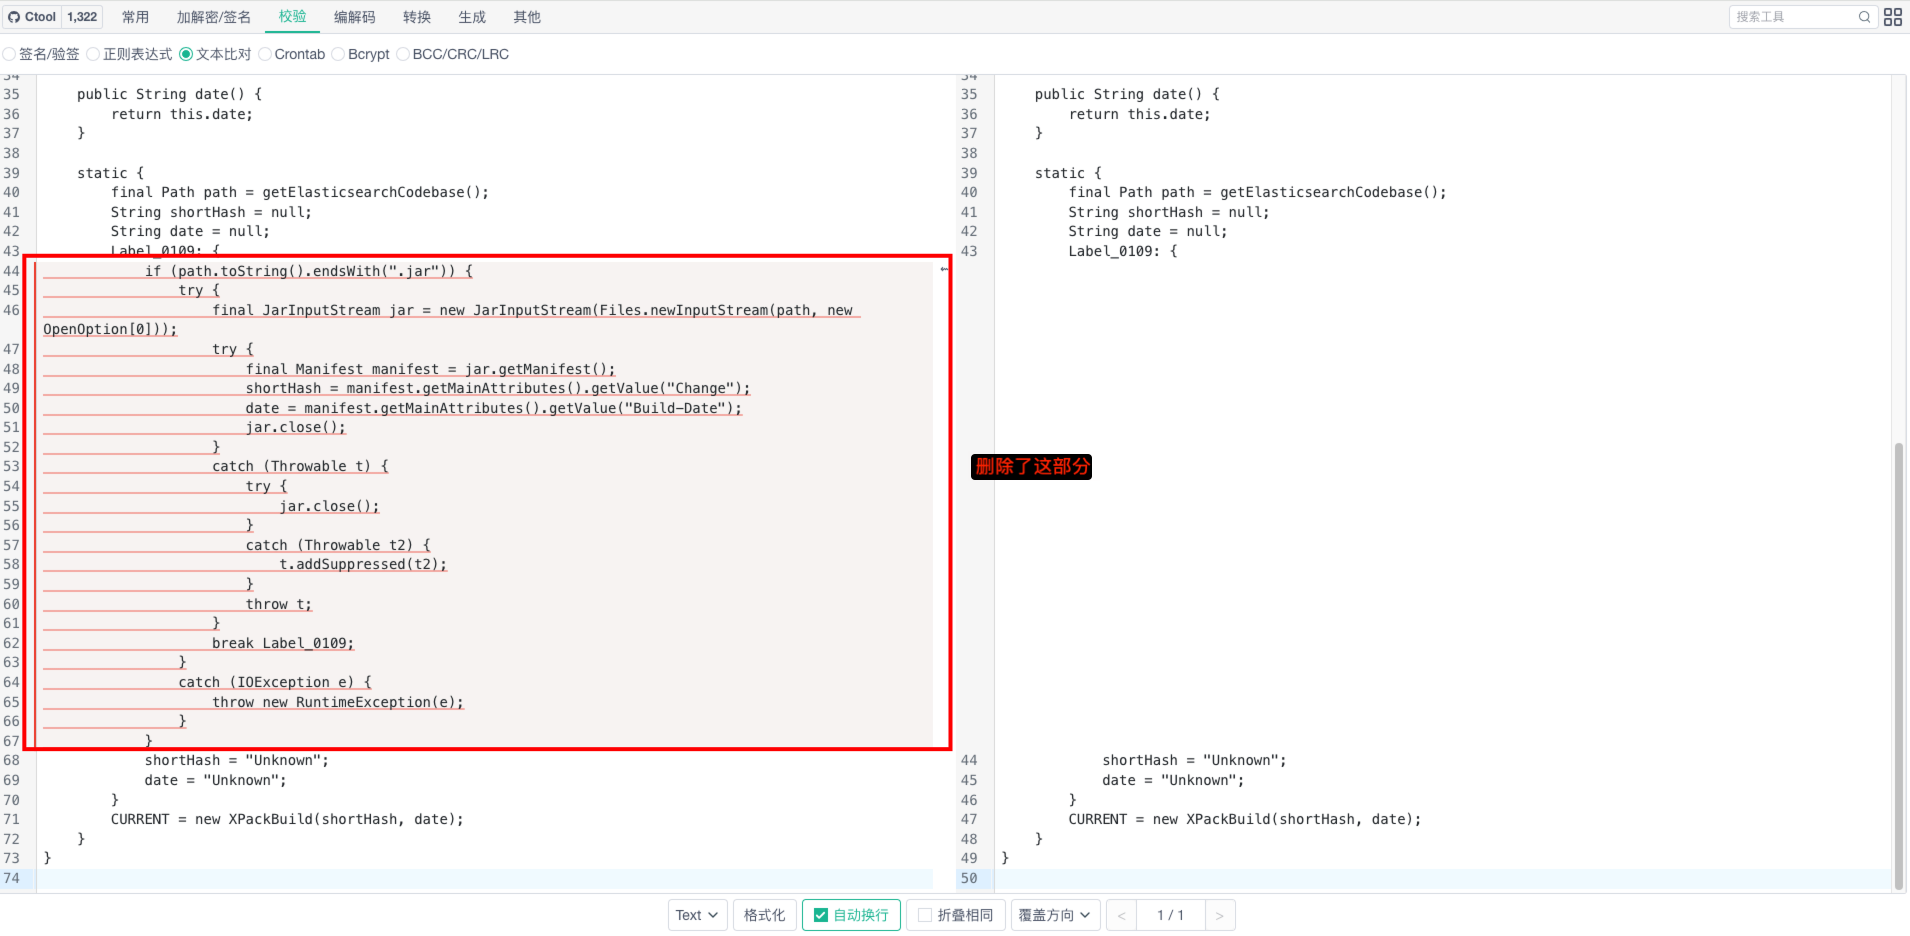
这里将Label_0109: {}中的判断逻辑给删掉了
package org.elasticsearch.xpack.core;

import java.net.*;
import org.elasticsearch.core.*;
import java.nio.file.*;
import java.io.*;
import java.util.jar.*;

public class XPackBuild
{
    public static final XPackBuild CURRENT;
    private String shortHash;
    private String date;

    @SuppressForbidden(reason = "looks up path of xpack.jar directly")
    static Path getElasticsearchCodebase() {
        final URL url = XPackBuild.class.getProtectionDomain().getCodeSource().getLocation();
        try {
            return PathUtils.get(url.toURI());
        }
        catch (URISyntaxException bogus) {
            throw new RuntimeException(bogus);
        }
    }

    XPackBuild(final String shortHash, final String date) {
        this.shortHash = shortHash;
        this.date = date;
    }

    public String shortHash() {
        return this.shortHash;
    }

    public String date() {
        return this.date;
    }

    static {
        final Path path = getElasticsearchCodebase();
        String shortHash = null;
        String date = null;
        Label_0109: {
            shortHash = "Unknown";
            date = "Unknown";
        }
        CURRENT = new XPackBuild(shortHash, date);
    }
}
2
3
4
5
6
7
8
9
10
11
12
13
14
15
16
17
18
19
20
21
22
23
24
25
26
27
28
29
30
31
32
33
34
35
36
37
38
39
40
41
42
43
44
45
46
47
48
49
差异对比
# 设置临时环境变量
export TEMP_ES_HOME=/home/elasticsearch/elasticsearch-7.14.2
# 创建临时目录将反编译java文件长传到该目录
mkdir /opt/temp_es_xpack
cd /opt/temp_es_xpack
2
# 将java文件编译成.class文件
javac -cp "$TEMP_ES_HOME/lib/elasticsearch-7.14.2.jar:$TEMP_ES_HOME/lib/lucene-core-8.11.1.jar:$TEMP_ES_HOME/modules/x-pack-core/x-pack-core-7.14.2.jar:$TEMP_ES_HOME/lib/elasticsearch-core-7.14.2.jar" XPackBuild.java

javac -cp "$TEMP_ES_HOME/lib/elasticsearch-7.14.2.jar:$TEMP_ES_HOME/lib/lucene-core-8.11.1.jar:$TEMP_ES_HOME/modules/x-pack-core/x-pack-core-7.14.2.jar:$TEMP_ES_HOME/lib/elasticsearch-core-7.14.2.jar" LicenseVerifier.java
2
3
运行完可以看到我们编译的.class文件
-rw-r--r-- 1 root root  410 Apr 12 21:53 LicenseVerifier.class
-rw-r--r-- 1 root root  532 Apr 12 21:48 LicenseVerifier.java
-rw-r--r-- 1 root root 1505 Apr 12 21:52 XPackBuild.class
-rw-r--r-- 1 root root 1235 Apr 12 21:48 XPackBuild.java
2
3
4
# 将.class文件重新打包进x-pack-core-7.14.2.jar文件
mkdir /opt/temp_es_xpack/jar && cd /opt/temp_es_xpack/jar
cp $TEMP_ES_HOME/modules/x-pack-core/x-pack-core-[0-9]*.jar /opt/temp_es_xpack/jar
jar -xvf x-pack-core-[0-9]*.jar
cp /opt/temp_es_xpack/LicenseVerifier.class /opt/temp_es_xpack/jar/org/elasticsearch/license/
cp /opt/temp_es_xpack/XPackBuild.class /opt/temp_es_xpack/jar/org/elasticsearch/xpack/core/
rm -f x-pack-core-7.14.2.jar
jar cvf x-pack-core-7.14.2.jar .
2
3
4
5
6
7
8
将修改好的文件放到集群所有服务服务器下的elasticsearch/modules/x-pack-core/目录,替换之前的文件
$ cp x-pack-core-7.14.2.jar /home/elasticsearch/elasticsearch-7.14.2/modules/x-pack-core/
cp: overwrite ‘/home/elasticsearch/elasticsearch-7.14.2/modules/x-pack-core/x-pack-core-7.14.2.jar’? y
2
# 修改License
修改内容:
- type:basic修改为
platinum - expiry_date_in_millis:修改为
2019657600000(2034-01-01 00:00:00)这里可以自己定义
{
    "license": {
        "uid": "xxxx",
        "type": "platinum",
        "issue_date_in_millis": 1712880000000,
        "expiry_date_in_millis": 2019657600000,
        "max_nodes": 100,
        "issued_to": "ljfd jiejsl (JDK)",
        "issuer": "Web Form",
        "signature": "xxxx",
        "start_date_in_millis": 1712880000000
    }
}
2
3
4
5
6
7
8
9
10
11
12
13
tip:
只修改type和expiry_date_in_millis字段就可以了,uid和signature字段不要修改
# 修改ElasticSearch配置
集群所有机器都需要修改配置,然后重启。
将下面这两个设置为false,其他的xpack参数注释掉。
xpack.security.enabled: false
xpack.security.transport.ssl.enabled: false
#xpack.license.self_generated.type: basic  # 这行破解后也不要设置
#xpack.security.transport.ssl.verification_mode: certificate
#xpack.security.transport.ssl.keystore.path: certs/elastic-certificates.p12
#xpack.security.transport.ssl.truststore.path: certs/elastic-certificates.p12
2
3
4
5
6
样例
bootstrap.memory_lock: true
bootstrap.system_call_filter: false
network.host: 172.16.24.193
http.port: 9200
transport.tcp.port: 9300
transport.tcp.compress: true
http.cors.enabled: true
http.cors.allow-origin: "*"
cluster.initial_master_nodes:  ["node-1","node-2","node-3"]
xpack.security.enabled: false
xpack.security.transport.ssl.enabled: false
#xpack.license.self_generated.type: basic # 这行破解后也不要设置
#xpack.security.transport.ssl.verification_mode: certificate
#xpack.security.transport.ssl.keystore.path: certs/elastic-certificates.p12
#xpack.security.transport.ssl.truststore.path: certs/elastic-certificates.p12
...
2
3
4
5
6
7
8
9
10
11
12
13
14
15
16
重启ElasticSearch集群
# 导入证书
# 方法一:通过Kibana导入
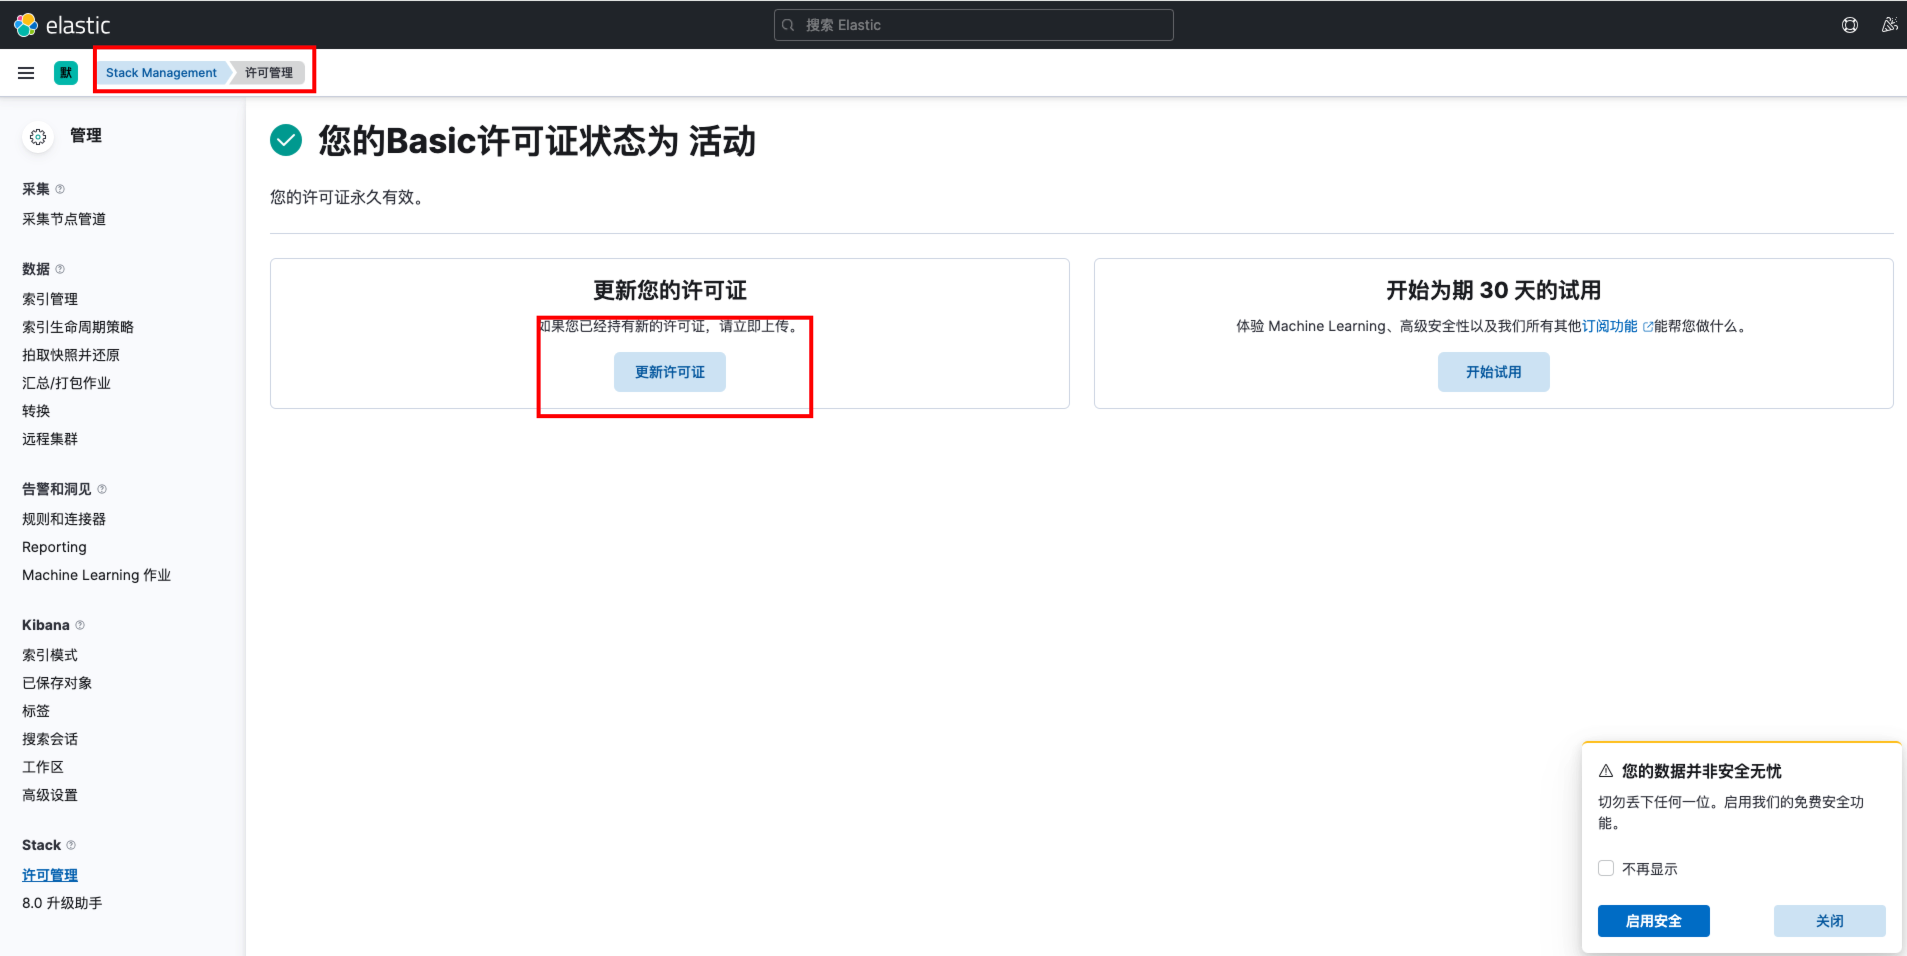
访问Kibana,进入Stack Management->许可管理
上传我们的证书
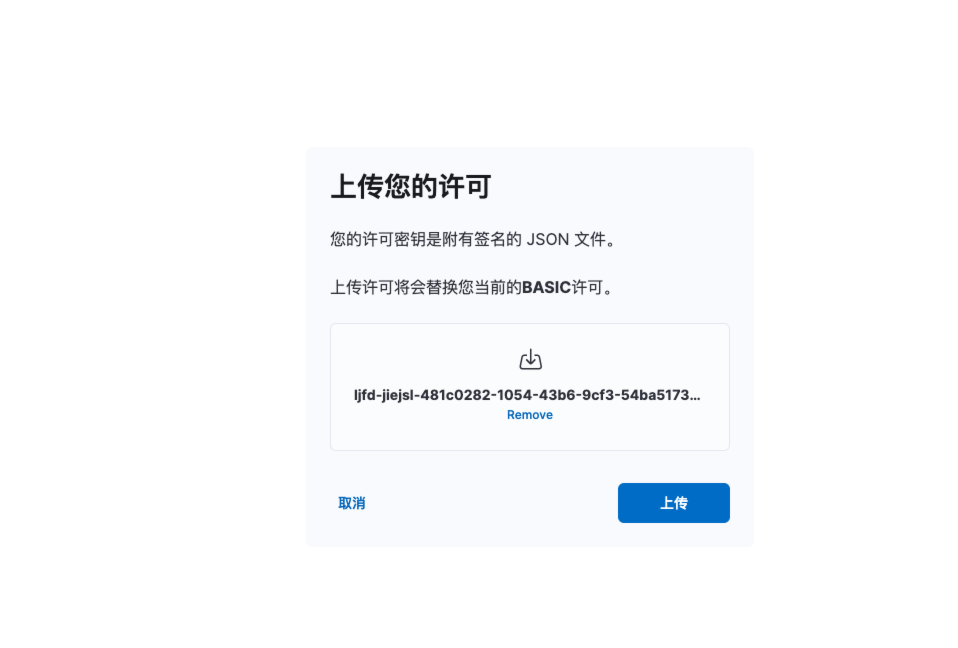
上传成功后会提示

访问链接也可以看到我们安装的证书信息:http://localhost:9200/_license,返回结果如下
{
  "license" : {
    "status" : "active",
    "uid" : "xxxx",
    "type" : "platinum",
    "issue_date" : "2024-04-12T00:00:00.000Z",
    "issue_date_in_millis" : 1712880000000,
    "expiry_date" : "2033-12-31T16:00:00.000Z",
    "expiry_date_in_millis" : 2019657600000,
    "max_nodes" : 100,
    "issued_to" : "ljfd jiejsl (JDK)",
    "issuer" : "Web Form",
    "start_date_in_millis" : 1712880000000
  }
}
2
3
4
5
6
7
8
9
10
11
12
13
14
15
# 方法二:通过curl导入(该方式暂未验证可行性)
$ curl -XPUT -u elastic 'http://localhost:9200/_xpack/license' -H "Content-Type: application/json" -d @license.json
Enter host password for user 'elastic':           # 输入elastic用户密码
{"acknowledged":true,"license_status":"valid"}    # license写入成功
2
3
# 恢复ElasticSearch配置信息
配置文件换成之前的,重启服务即可。
tip:
下面这个配置不要设置成basic,直接注释掉就可以
#xpack.license.self_generated.type: basic
或者改成
xpack.license.self_generated.type: platinum(我没试,我直接注释了)
#
bootstrap.memory_lock: true
bootstrap.system_call_filter: false
network.host: 172.16.24.192
http.port: 9200
transport.tcp.port: 9300
transport.tcp.compress: true
http.cors.enabled: true
http.cors.allow-origin: "*"
cluster.initial_master_nodes:  ["node-1","node-2","node-3"]
#xpack.license.self_generated.type: basic
xpack.security.enabled: true
xpack.security.transport.ssl.enabled: true
xpack.security.transport.ssl.verification_mode: certificate
xpack.security.transport.ssl.keystore.path: certs/elastic-certificates.p12
xpack.security.transport.ssl.truststore.path: certs/elastic-certificates.p12
2
3
4
5
6
7
8
9
10
11
12
13
14
15
16
到此配置完成。
# 参考文章
https://www.junyao.tech/posts/7a4f5f3c.html
https://blog.csdn.net/qq_48736646/article/details/135463275
